FormTypeの追加
ここでは、FormTypeの追加方法について解説します。
入力出来る項目は以下として作成していきます。
| 項目名 | 型 | 必須 |
|---|---|---|
| 名前 | text | ○ |
| コード | text | ○ |
app/Plugin/Customize/Form/Type配下に、FormTypeを作成します。
ファイル名は、SampleFormType.phpとしてください。
<?php

namespace Plugin\Customize\Form\Type;

use Symfony\Component\Form\AbstractType;
use Symfony\Component\Form\FormBuilderInterface;
use Symfony\Component\Validator\Constraints as Assert;

class SampleType extends AbstractType
{
    public function buildForm(FormBuilderInterface $builder, array $options)
    {
        $builder
            ->add(
                'name',
                'text',
                array(
                    'constraints' => array(
                        new Assert\NotBlank(),
                    ),
                )
            )
            ->add(
                'code',
                'text',
                array(
                    'constraints' => array(
                        new Assert\NotBlank(),
                    ),
                )
            );
    }

    public function getName()
    {
        return 'customize_sample';
    }
}
作成したFormTypeを利用できるようにする
作成したFormTypeを利用するには、ServiceProviderで定義する必要があります。
app/Plugin/Customize/ServiceProvider/CustomizeServiceProviderを修正します。
class CustomizeServiceProvider implements ServiceProviderInterface
{
    public function register(BaseApplication $app)
    {
        // FormType
        $app['form.types'] = $app->share($app->extend('form.types', function ($types) use ($app) {
            $types[] = new SampleType();
            return $types;
        }));
以上で定義は完了です。
Controllerからは、以下のコードでFormTypeを呼び出すことができます。
$builder = $app['form.factory']->createBuilder('customize_sample');
Symfony2では、テキストだけでなく、数値やメールアドレスなど、様々なtypeを使用することができます。
また、バリデーション(入力チェック)も同様にビルトインのバリデーションがあります。
詳しく知りたい場合は、Symfony2のドキュメントを参照してください。
FormTypeの拡張
EC-CUBE本体で定義されているFormTypeを拡張するには、フックポイントを利用する方法と、Form Extensionを利用する方法の2種類があります。
フックポイントの場合は、フックポイントが呼び出される箇所でのみ拡張されます。
Form Extensionの場合は、FormTypeの定義自体を拡張し、影響は全体に及びます。
フックポイントを利用したForm拡張
管理画面>特定商取引法に項目を追加する場合を例として解説していきます。
event.ymlにフックポイントを定義する
app/Plugin/Customize/event.ymlを修正します。
admin.setting.shop.trade.law.index.initialize:
    - [onAdminSettingShopTradeLawIndexInitialize, NORMAL]
CustomizeEventクラスにメソッドを定義する
app/Plugin/Customize/CustomizeEvent.phpを修正します。
<?php

namespace Plugin\Customize;

use Eccube\Event\EventArgs;

class CustomizeEvent
{
    private $app;

    public function __construct($app)
    {
        $this->app = $app;
    }

    public function onAdminSettingShopTradeLawIndexInitialize(EventArgs $event)
    {
        $builder = $event->getArgument('builder');
        $builder->add(
            'plg_test',
            'text',
            array(
                'label' => 'テスト項目',
                'mapped' => false,
            )
        );
    }
}
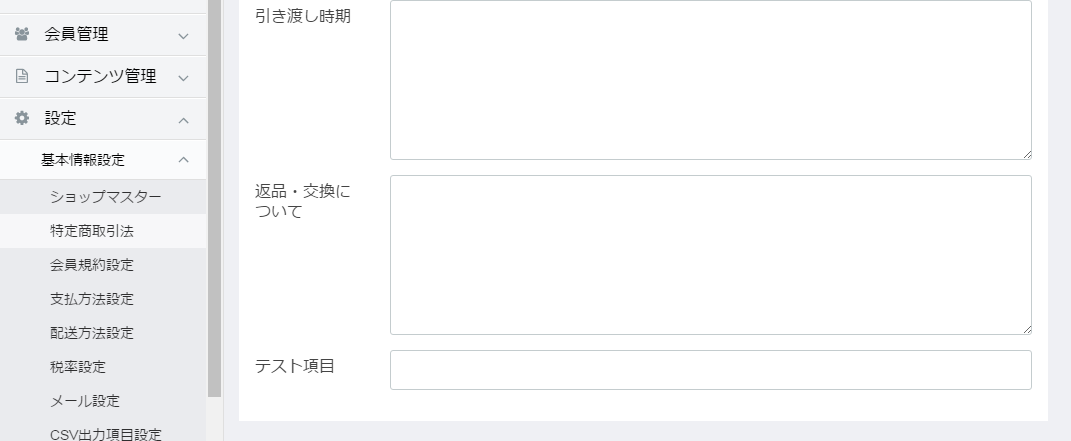
画面を確認し、以下のように表示されていれば成功です。

フックポイントの詳細については、プラグイン仕様書(PDF)を参照してください。
Form Extensionを利用したForm拡張
こちらも同様に、管理画面>特定商取引法に項目を追加する場合を例として解説していきます。
app/Plugin/Customize/Form/Extension/Admin配下に、FormExtensionを作成します。
ファイル名は、TradelawTypeExtension.phpとしてください。
<?php

namespace Plugin\Customize\Form\Extension\Admin;

use Symfony\Component\Form\AbstractTypeExtension;
use Symfony\Component\Form\FormBuilderInterface;

class TradelawTypeExtension extends AbstractTypeExtension
{
    /**
     * {@inheritdoc}
     */
    public function buildForm(FormBuilderInterface $builder, array $options)
    {
        $builder->add(
            'plg_test_ext',
            'text',
            array(
                'label' => 'テスト項目(Extension)',
                'mapped' => false,
            )
        );
    }

    public function getExtendedType()
    {
        return 'tradelaw';
    }
}
次に、ServiceProviderにFormExtensionの定義を追加します。
class CustomizeServiceProvider implements ServiceProviderInterface
{
    public function register(BaseApplication $app)
    {
        // FormExtension
        $app['form.type.extensions'] = $app->share($app->extend('form.type.extensions', function ($types) use ($app) {
            $types[] = new \Plugin\Customize\Form\Extension\Admin\TradelawTypeExtension();
            return $types;
        }));
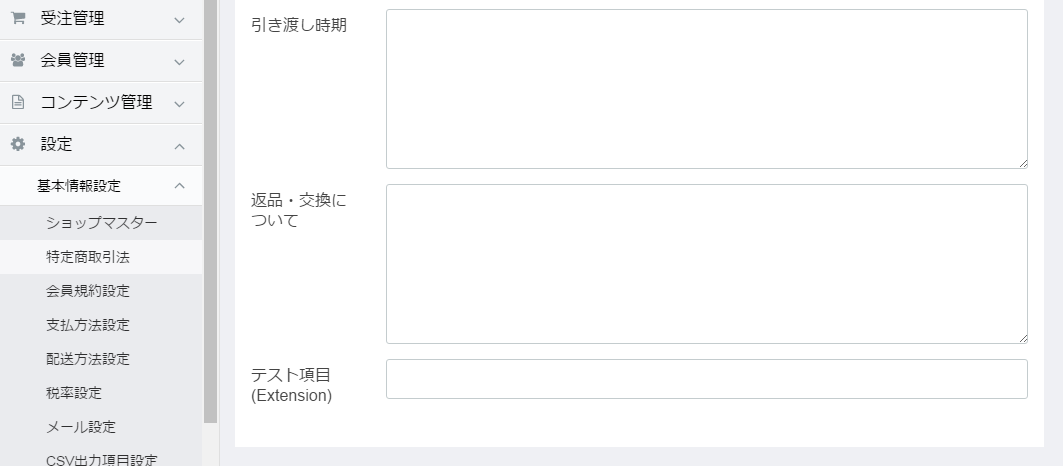
画面を確認し、以下のように表示されていれば成功です。
